Thursday, September 15, 2011

Pate Chaud: Vietnamese Pork Pie

IMG_7834

As challenging and fun making pate en croute sounds, I sadly didn’t have enough time this month to take a stab at it.  Thankfully, English pork pie was offered as an alternative for the September CharcutePalooza challenge.  I didn’t know what an English pork pie consisted of until I read the recipe in Charcuterie.  Once I read the recipe, though, I was completely familiar with it and realized that I’d been making pork pies for the past few years and eating them since childhood in the form of pate chaud.

IMG_7735

Pate chaud is essentially the Vietnamese version of a pork pie.  Instead of Western seasonings, the pork is typically seasoned with fish sauce.  Depending on the cook, miscellaneous things like wood ear mushrooms may be added for a crunchy texture.  However, my grandma’s vegetarian version that I grew up on consisted of Morningstar Griller soy meat, mushrooms, peas, carrots, and Maggi (sort of like soy sauce) baked inside a handheld puff pastry shell.  The soy meat never bothered me because to this day I still prefer her version over any meat-based pate chaud I’ve ever tried.

IMG_7762

My goal for this month’s challenge was to use the English pork pie recipe and technique in Charcuterie as a foundation and impart my grandma’s influence on it in order to make a respectable pork pate chaud.  Typically my grandma uses frozen peas, but I saw some nice snap peas at the market and had to use them.  Also, my grandma and I usually use premade frozen puff pastry dough, but making my own pastry dough from scratch this time was a good experience.

IMG_7795

With the exception of a slightly soggy bottom (probably due to underestimating the amount of water released from the mushrooms) the pate chaud came out pretty good.  The pastry was understandably less flaky than the puff pastry that I’m used to, but it was flaky enough to hold its own.  One regret was not forming the pate chaud into its traditional handheld portions.  This would’ve made freezing and reheating portions much easier.

In all honesty, though, I still prefer my grandma’s vegetarian pate chaud.  There’s just something about the combination of soy meat, mushrooms, peas, carrots, and Maggi that I just love.

IMG_7825


Pate Chaud Meat Filling

Mise En Place

  1. 675 g pork, freshly ground
  2. 100 g peas, diced
  3. 100 g carrots, diced
  4. 100 g shiitake mushrooms, roughly chopped
  5. 5 g black pepper, freshly ground
  6. 80 g mushroom-pork stock, reduced slightly more than normal and chilled
  7. 40 g Maggi, European version with red top is preferable

Tuesday, August 30, 2011

Muscadines & Scuppernongs

IMG_7860

(Reposting because the image links seemed broken)

Before a couple weeks ago, I had no clue what a muscadine (purple) or scuppernong (green) was and I’m still not sure what the correct pronunciations is for both words.  However, thanks to the always exciting Marketplace On Oakton, one thing I do know is that they’re both super awesome.  If you’ve ever had Kasugai Muscat Gummies, muscadine and scuppernong flesh tastes exactly like that.

IMG_7904

Extremely sweet with an intense grape flavor, the sphere of flesh can be easily harvested from the thick and contrastingly tart skin.  Because the skin is so tart, I usually can only eat 75% of a serving with the skin on, saving the final 25% for flesh-only bites.

IMG_7882

Since I never enjoy wasting things, I thought about making muscadine gummies and adding a touch of honey to nudge the overall flavor towards the sweet side rather than tart side.  I heated, blended, and reduced down a pot of muscadines, scuppernongs, honey, water, and agar.  After a few taste tests and further reducing until the mixture tasted like a grape explosion, I waited for the mixture to set.  However, that plan didn’t work out so well.

IMG_7919

Although I used a 1% agar solution just as I did with the tempura headcheese, the mixture never solidified.  I’m not sure if I did something wrong or if something in the muscadines and scuppernongs somehow inhibited the agar from working its magic.  What’s one to do when life gives you a goopy grape mixture?  Freeze them into mini popsicles of course.

Monday, August 15, 2011

HEADCHEESE – parsley root, doenjang mustard, smoldering cinnamon

Having been exposed to headcheese at a young age through banh mi, I fortunately don’t have an aversion to it.  I also have no qualms about handling a pig’s head as I’ve cooked with it in the past.  Although I’ve used pig’s head for tamales, congee, and barbeque in the past, I’ve never made headcheese.  This month’s CharcutePalooza challenge provided a great excuse to finally make some.

IMG_7633

For the headcheese challenge, I wanted to focus on texture because headcheese typically lacks in that department.  Placing some headcheese on top of a cracker didn’t sound very fun, so I thought about battering and deep frying pieces of headcheese.  However, I wanted to preserve the integrity of the gelatin in the headcheese and prevent it from melting in the fryer.  After all, where’s the fun in eating headcheese if it doesn’t have any gelatin?
IMG_7566

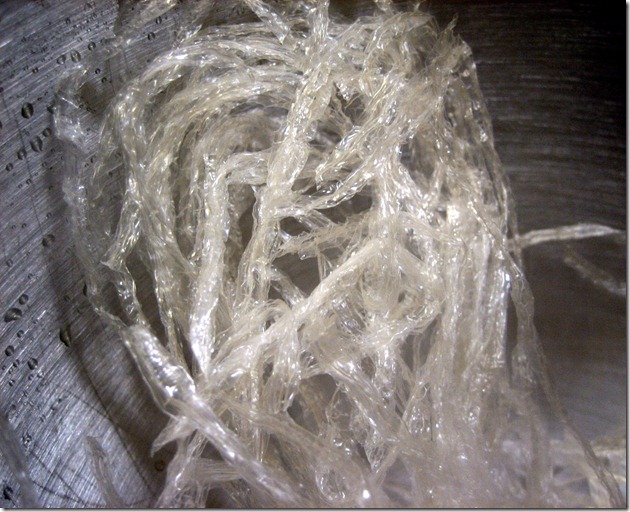
The use of agar-agar came to mind as a way to keep the gelatin from melting under high heat.  My mom used to make jasmine-coconut agar jelly when I was young, so working with agar wasn’t too foreign to me.  The application of agar in a hot preparation, though, was a first.  I already knew agar-based gelatins held their gel state at room temperature, and a little research revealed that agar-based gelatins melt at 85 Celsius.  I decided to use agar threads as they’re readily available at most Asian grocers and 3 times cheaper than agar powder found online.

IMG_7571

Since I received some negative responses about showing a pig’s head in previous head-related posts, I’ll spare readers the sight of the suckling pig’s head I bought from Marketplace Oakton.  I feel pretty spoiled having suckling pig’s head so readily available and for only $0.99/lb.  After poaching the head and separating the liquid, I added enough agar to bring the liquid to a 1% agar solution.  I’m not sure how apparent it is in the picture above, but I think I added too much liquid to the mold.

During my research into how much agar to use per unit of liquid, I stumbled upon Grant Achatz’s pheasant with burning oak leaves and sweet potato with smoldering cinnamon stick recipes.  I’ve had the fortunate opportunity to eat at Alinea a few times, so I was familiar with the “tempura on a skewer that serves as an aroma source” style of preparation.  It didn’t take long for me to realize that preparing the headcheese in a similar fashion would be interesting and fun.

IMG_7555

When thinking about what to pair the headcheese with, I looked to classic combinations like pickles and mustard.  Initially, I wasn’t sure what I’d use for the pickle, but upon seeing fresh parsley root at Marketplace Oakton I knew I had to use it.  It was only natural to use the leaves in the poaching liquid and make a quick pickle out of the roots.

IMG_7615

The previous week I worked with doenjang (a fermented soybean paste akin to miso) for the first time and made some doenjang jigae.  Being on somewhat of a doenjang binge and with mustard on my mind, I was reminded of my cousin’s miso salad dressing I had as a kid.  The miso salad dressing tasted like honey mustard, so I figured an agar-based doenjang mustard gel would work nicely.
IMG_7617IMG_7622

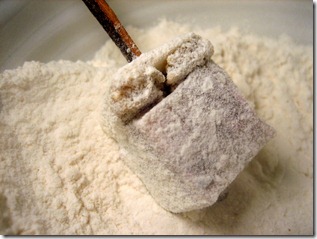
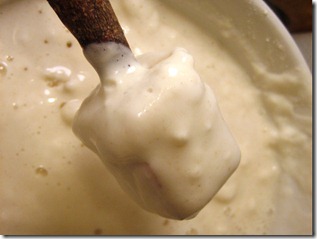
A common element between the mustard, pickled parsley root, and headcheese was allspice.  Since allspice and cinnamon go hand in hand, the choice of a cinnamon stick skewer made sense.  The tempura batter specified by Achatz was super light and when fried provided a nice crispy texture.  Using a blowtorch, I set the top of the cinnamon stick ablaze to release its aroma.

IMG_7630

To plate the bite, I used an old wire whisk (a great idea from Martin over at Alineaphile) to achieve some semblance of the original served at Alinea that comes nestled in the “squid” by Crucial Detail.  The squid is “designed to hold a delicate course in an upright position.  Six thin wires distribute weight evenly and allow air flow around the dish.”

IMG_7664

Overall, the tempura headcheese was a success and a lot of fun to research and implement.  Deep frying headcheese and having the gelatin not melt tickled me pretty good.  I also achieved my goal of highlighting texture for this challenge.  The fried tempura batter provided crispiness and the pickled parsley root provided crunchiness.  Everything worked from a flavor standpoint as well.  The combination of headcheese, pickle, and mustard was immediately familiar, and the addition of doenjang added a sweet note to the bite.

I don’t know if I’ll be making these again any time soon due to the amount of time required, but I’m confident enough to try Achatz’s pheasant and sweet potato recipes now that I’m familiar with the general strategies.  I’m also walking away with a great tempura batter ratio.  Out of all the CharcutePalooza challenges thus far, this one has been my favorite as I’ve learned the most from it.


Doenjang Mustard Gel (adapted from here)

Mise En Place

  1. 30 g yellow mustard seeds
  2. 30 g brown mustard seeds
  3. 60 g doenjang
  4. 1 g white peppercorns
  5. Pinch allspice
  6. 70 g white wine
  7. 70 g vinegar
  8. 45 g shallot, minced
  9. 3 g agar

Method

  1. Combine all ingredients and refrigerate overnight
  2. Transfer all ingredients to a saucepan or pot over high heat and bring to boil
  3. Quickly transfer all ingredients to a blender and blend for ~2 minutes
  4. Quickly transfer mixture into a small mold (must set to at least 3 mm thickness) and refrigerate until completely set, ~2 hours

HEADCHEESE – pickled parsley root, doenjang mustard, smoldering cinnamon (adapted from here)

Mise En Place

  1. Headcheese, cut into a 2 cm cubes
  2. Pickled parsley root, cut into 2 cm X 2 cm X 3 mm rectangular prisms
  3. Doenjang mustard gel, cut into 2 cm X 2 cm X 3 mm rectangular prisms
  4. Cinnamon stick, pared down thin enough on one end to skewer the ingredients
  5. Flour for dredging
  6. Tempura batter

Method

  1. Skewer the pickled parsley root onto the cinnamon stick, followed by the doenjang mustard gel, and lastly the headcheese
  2. Dredge the ingredients in flour and shake off any excess
  3. Coat the ingredients in tempura batter and let any excess drip off
  4. Holding onto one end of the cinnamon, dip ingredients in 190 Celsius oil until golden, ~2 minutes
  5. Drain on paper towels and season with salt
  6. Take a flame to one end of the cinnamon until smoldering

Friday, July 15, 2011

Homemade Ramen With Hot Dogs & Corn

Often times when my dad was too busy to cook a proper meal, he would make a bowl of Sapporo Ichiban instant ramen and fortified it with a hot dog and canned corn.  The corn my sound odd, but its sweetness goes well with the saltiness of the hot dog and instant ramen broth.  Once I became old enough to boil a pot of water and make instant ramen by myself, I carried on his tradition whenever I needed something to eat in a pinch.  Eventually, I’d come to add my own personal touch to instant ramen by using Mexicorn instead of plain canned corn.

IMG_7505

With this month’s Charcutepalooza challenge being hot dogs, I was motivated to make one of the most treasured fast foods from my childhood completely from scratch.  Not only would I make the hot dogs from scratch, but the noodles, broth, and Mexicorn as well.

IMG_7399IMG_7411

By now, grinding meat has become second nature.  However, emulsifying meat was new territory.  I was pretty paranoid when the meat was being blended in the food processor.  Fears of the emulsification breaking ran wild through my head as I’ve broken a mayonnaise once.  Thankfully the emulsification came together without a hitch.

IMG_7417IMG_7479

I did have issues stuffing the hot dogs, though.  I lost the small plastic propeller from my sausage stuffer Kitchen Aid attachment which caused the meat to extrude unevenly.  Although I was successful in the end, stuffing was a bit harder this time around.  To smoke the hot dogs, I again used the method of starting the stovetop smoker on the stove for 10 minutes and then transferring it to the oven for about an hour until the hot dogs came to temperature.

IMG_7432IMG_7440

The task of making the ramen noodles from scratch seemed ambitious at first, but once I got started I realized how easy it is to make a basic noodle (as long as you have a pasta roller and cutter).  Making the noodles simply amounted to mixing the dough in a stand mixer, portioning the dough, running the dough through a pasta roller, and running the dough through a pasta cutter.

IMG_7462

One notable thing about the ramen noodles was the addition of xanthan gum.  Inspired by Tom’s modernist ravioli, I added 3 grams of xanthan gum to my 300 gram batch of flour.  True to his word, my noodles didn’t stick together at all even in the absence of a dusting of flour.

IMG_7511

When I gulped down my first spoonful of soup and happily slurped the chewy noodles, I was taken back to my childhood.  I could picture myself sitting in the kitchen in Southern California filling my stomach with instant ramen packed with umami.  Only this time, the umami came from a broth consisting of homemade dashi and homemade pork stock rather than an MSG-laden packet of soup base.  Also, the smokiness of the bonito flakes in the dashi complimented the smokiness of the hot dog quite well.

Overall, the dish and challenge was a resounding success.  Not only did I get to relive a moment of my childhood, but I learned how to make an emulsified sausage, ramen noodles, and dashi (which I will be using a lot in the future) from scratch.

IMG_7517


Ramen Noodles

Via norecipes.com (with an addition of 3 grams xanthan gum)

Ramen Broth

Via citrusandcandy.com

Mexicorn

Mise En Place

  1. 250 g corn, cut from the cob
  2. 130 g bell peppers, skinned and diced

Method

  1. Melt a pad of butter in a pan over medium heat
  2. Add corn and bell peppers to pan and saute for a few minutes
  3. Salt to taste

Wednesday, June 15, 2011

Goi Ga (Vietnamese Chicken & Cabbage Salad) Sandwich

This month’s CharcutePalooza challenge had the least specific parameters thus far.  The task was to simply create an encased poultry sausage.  Initially, I thought the lack of strict parameters would be nice as I’d be able to be more creative than usual.  However, I quickly realized I hadn’t eaten many poultry sausages and lacked interesting ideas for what to make.  The only poultry sausage that came to mind was the duck sausage topped with foie gras served at Hot Doug’s.  Since I copied another Chicago sausage eatery’s menu item last month, I felt obligated to create something original this time around.

IMG_7276

With only one poultry sausage to work off of as inspiration, I turned to poultry dishes I liked to eat.  A few came to mind, but the one that stuck was goi ga: Vietnamese chicken and cabbage salad. The bright and refreshing nature of the dish would be a welcome treat in the sweltering summer heat.

Typically, goi ga consists of shredded cabbage, shredded carrot, shredded chicken, pickled onion, Thai basil, mint, cilantro, and lime & fish sauce vinaigrette.  I tend to prefer regular basil over Thai basil and only a small amount of mint for this dish.

IMG_7238

I decided to make the sausage consist of marinated chicken, pork fat, basil, cilantro, mint, and garlic.  The sausage would then be nestled between a bun lubricated with mayo and topped with a Vietnamese cabbage slaw taken directly from the source dish.

IMG_7240

Stuffing the sausages was pretty easy since I had experience stuffing merguez last month.  This time around, though, I used salt-packed hog casings rather than fresh lamb casings.  According to Michael Ruhlman, this type of casing provides the best snap-factor.  However, the brand I bought must not have been the best quality.  The snap-factor wasn’t there at all and in fact the texture was slightly chewy and tough.

IMG_7253IMG_7264

Aside from the disappointing casings, I was happy with the sausage and sandwich as a whole.  It definitely reminded me of traditional goi ga, but it was different enough to taste like something new.  Until I can find quality hog casings, though, I think I’d rather have this sausage cooked as freeform patties or links.

IMG_7265


Marinade

Mise En Place (for 900 g / 2 lbs chicken)

  1. 42 g (2 Tbsp.) honey
  2. 45 g (3 Tbsp.) fish sauce
  3. 40 g (~2 limes) lime juice

Method

  1. Combine all ingredients and mix until homogenized

Goi Ga Sausage

Mise En Place

  1. 900 g (~ 2 lbs) dark meat chicken, cut into strips for grinding
  2. 300 g (~ 2/3 lbs) pork fat, cut into strips for grinding
  3. 127 g marinade
  4. 9 g garlic, minced
  5. 16 g basil, chopped
  6. 16 g cilantro, chopped
  7. 5 g mint, chopped

Method

  1. Combine chicken, herbs, garlic, and marinade and marinate overnight
  2. Drain marinade
  3. Follow standard sausage grinding and stuffing procedures

Lime & Fish Sauce Vinaigrette

Mise En Place

  1. 105 g oil
  2. 10 g (~1/2 lime) lime juice
  3. 15 g (1 Tbsp.) fish sauce
  4. 21 g (1 Tbsp.) honey

Method

  1. Combine lime juice, fish sauce, and honey
  2. Slowly whisk in oil until incorporated

Goi Ga Slaw

Mise En Place

  1. 250 g (~1/2 lbs) cabbage, shredded
  2. 100 g (~1/5 lbs) carrot, shredded
  3. Pickled shallots
  4. Fresh basil
  5. Fresh cilantro
  6. Fresh mint
  7. Lime & fish sauce vinaigrette

Method

  1. Combine cabbage and carrot
  2. Add pickled shallots, herbs, and vinaigrette to taste