Sunday, March 6, 2011

Dulce De Leche Brownies

Dulce de leche is a rather recent discovery for me.  A couple years ago, I helped organize a few international movie nights at work and had the idea to bring in some food from each movie’s country of origin.  For example, I made samosas for the Bollywood movie night.

IMG_6770

When it came time to watch the Argentinian film Nine Queens, one of my favorite movies, I turned to the advice of my friend from Buenos Aires because I had no clue what the cuisine of Argentina was like.  She suggested I make alfajores de dulce de leche: a sandwich cookie with dulce de leche in the middle.  I was hooked on dulce de leche from that point on and frequently found myself eating it straight up by the spoonful.  Simply describing it as “caramel” doesn’t really do it justice.

IMG_6789IMG_6786

The first time I made dulce de leche, I used the stovetop method of simmering a can of sweetened condensed milk for a few hours.  This method works fine, but now that I have a sous vide setup, I thought I’d try it that way and hold it in a 185 F water bath for about 14 hours.  As a side note, I would not recommend the microwave method of making dulce de leche unless time is an issue.  It’s too much trouble compared to the simmer-in-a-can method.

Recently, I’ve been making chocolates and chocolate pastries featuring dulce de leche.  The rich and creamy caramel-like flavor of dulce de leche (as I said before, not doing it justice) goes nicely with the bitterness of chocolate.  The brownie recipe I’ve been tinkering with is from Thomas Keller’s Ad Hoc at Home and I found the recipe’s method of preparing the butter interesting.  Not only does it call for a artery-clogging 3 sticks of butter, but it calls for melting half the butter and using that to melt the other half.  This results in a very creamy emulsion that I’ve never seen before with butter.
IMG_6731IMG_6734

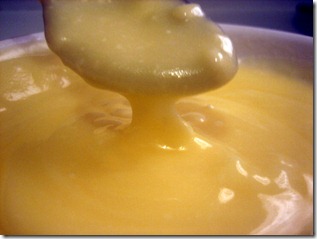
As for the dulce de leche, I portioned out 100 grams of the confection and popped it in the freezer to harden so I could chop it up into small, even chunks and add it to the batter.  This probably wasn’t the best idea as the distribution of the dulce de leche didn’t turn out very well and I ended up just scooping dulce de leche onto the finished brownies.
IMG_6739IMG_6742

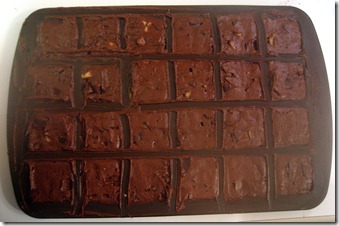
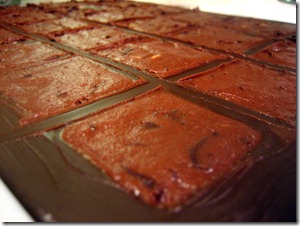
Instead of using a traditional baking vessel, I decided to use a silicone mold that I originally bought for making chocolates.  Incidentally, the mold is actually marketed as a brownie mold.  The mold worked well enough and helped each square develop a nice texture on the top edge much like the rim on a muffin top.  Brownies with a muffin top rim?  I’ll take it.

IMG_6779

Another success was serving the brownies with a side of crispy homemade pancetta.  Alternating between sweet and salty extended the addictiveness of an already crack-like dessert, and I’m a big fan of a little saltiness with my sweets to balance things out.

Dulce De Leche

Mise En Place

  • One 14-ounce can sweetened condensed milk, label removed

Method

    1. Submerse the can completely in a pot and simmer (do not boil) for 3-4 hours.  A longer simmering time results in a thicker dulce de leche.  Alternatively, submerse the can in a 185 F water bath for about 14 hours.
    2. Cool for about 15 minutes.  At this point, the dulce de leche will be like a thick sauce and be used as such if desired.
    3. Refrigerate.  It will harden as it cools.

Brownies

Via Ad Hoc at Home

Tuesday, March 1, 2011

Rice-Butter-Maggi-Egg

IMG_6509

Everyone has fond memories of their favorite comfort foods growing up.  For me, one of those comfort foods is what my family refers to as “rice-butter-Maggi-egg.”  The dish is exactly what it sounds like: rice topped with butter, Maggi, and eggs with a dash of black pepper.  Rice-butter-Maggi-egg was my mom’s go-to dish whenever she needed to whip something up fast.  It has since become one of my emergency meals when I’m feeling too lazy to do any actual cooking or when I have no produce or pantry items to work with.

IMG_6494IMG_6691

For anyone not familiar with Maggi, I’d describe it as zingy soy sauce with more depth.  It’s easily found at any Asian grocery store, but the trick is to find a place that sells Maggi that’s made in Europe (Germany if I recall correctly).  The bottles with the yellow tops are made in China and are perfectly fine, but the bottles with the red tops that are made in Europe taste so much better.  The European version has more depth and punchiness than the Chinese version.

IMG_6689IMG_6692

When it comes to the butter in rice-butter-Maggi-egg, I tend to use Bretel.  It may seem odd to get butter out of a can, but it’s seriously really good and melts in your mouth.  I first discovered Bretel maybe 10 years ago at my aunt’s house where a petit dejeuner of bread and butter is common for breakfast.  The baguettes come from a Vietnamese-Belgian bakery and the butter from France in the form of Bretel.  Canned butter is so popular in Vietnam that counterfeit brands exist.  My mom and uncle have told me stories of how people in Vietnam unwittingly buy Bertel instead of Bretel.

IMG_6484

The egg component of rice-butter-Maggi-egg typically consists of a sunny side up egg.  However, in my ongoing experimentation with sous vide eggs, I decided to sous vide the eggs at 63 C (145.4 F) for an hour.  The yolks turned out creamy and runny like I wanted, but the whites turned out a little too runny for my taste.  Texturally, a custardy and slightly runny egg white doesn’t sit well with me.  To remedy this, I put the eggs in boiling water for about 30 seconds to firm up the egg whites.

IMG_6514

Once all the components are on a plate, one of my favorite things to do is to break the yolk and mix it with a little of buttered rice and Maggi.  This humble dish will always be a winner in my book and I can’t see myself ever getting tired of it.

Tuesday, February 15, 2011

Banh Bot Chien: Vietnamese Fried Rice Flour Cake With Pancetta

I may be in the minority here when I say this, but I don’t like bacon as much as most other people do.  I don’t swoon over it, and I’m envious when I hear someone exclaim “everything’s better with bacon!” because I wish I enjoyed something so much that it made whatever I was eating instantly better.  As an outsider looking in, bacon is the MSG of meats.

IMG_6565

It should come as no surprise then that I’ve always preferred my breakfast eggs with sausage because I enjoy the spices typically found in breakfast sausages.  Bacon always seemed like a crunchy strip of salt to me.  So when I learned that the second CharcutePalooza challenge would be pancetta, a cousin of bacon, I was somewhat deflated.  However, I saw this as a chance to give salt cured pork belly a shot at winning me over as my preferred egg accompaniment.  Immediately, I knew the egg dish that I wanted to make: bot chien, or Vietnamese fried rice flour cake.  This wouldn’t be the first time I’ve used an Italian ingredient for a Vietnamese dish.

IMG_6651

Bot chien is by far my favorite savory egg dish.  Sadly, I was only introduced to it a few years ago at Tan Tan Restaurant in Houston.  The first time I had bot chien, I loved it so much that I angrily asked my mom why we never ordered it in the past or why she’d never made it at home.  According to her, bot chien is a rarity in the States and to some extent Vietnam.  She reminisces about having to hunt down bot chien vendors in dingy back alleys of Saigon for an afterschool snack.

IMG_6620IMG_6644

Essentially, bot chien consists of fried rectangular pieces of steamed rice flour cake bound together by eggs and topped with fried shallots, dried radish, and raw scallion.  It’s served with a side of soy sauce mixed with vinegar for dipping to which I usually add some Sriracha, sambal oelek, pickled pepper, or old dry mom sauce to (David Chang recently declared old dry mom sauce as the best sauce on No Reservations, and I couldn’t agree more).  The resulting bite is a symphony of texture and flavor.

You get sweet and sour from the dried radish, salty and sour from the dipping sauce, sweet from the fried shallots, savory from the egg, bright and pungent from the raw scallion, and spicy from the hot sauce or pickled peppers if you’re so inclined.  If that wasn’t enough to seal the deal, you get crispy from the fried rice cake and fried shallots, crunchy from the dried radish, spongy from the egg, and slightly chewy from the inside of the rice cake.

IMG_6549

I thought it would be worth mentioning that I used black radish and pickled them with some carrot in place of dried radish.  I saw black radishes at the market and had never used them before, so I thought I’d give them a whirl.  They turned out to be very similar to daikon in flavor and got the job done well.

IMG_6468IMG_6457

The process of making the CharcutePalooza meat of the month was again very simple and straightforward: salt and season, wait a while, rinse, hang, wait a while, enjoy.  One thing that I found funny was the presence of nipples on my pork belly.  I’ve worked with pork belly many times in the past, but only noticed the nipples this time.  However, upon closer inspection, it looks like the pork belly I used for thit kho also had nipples.

IMG_6474IMG_6528

My spare bathroom paired with a humidifier was once again used as the meat hanging area.  Due to unforeseen time constraints, I decided to make the flat version of pancetta as the time required to hang is considerably less than that of rolled pancetta.

IMG_6591

IMG_6612IMG_6633

For my bot chien, I substituted the crispy fried shallots with crispy fried lardons of pancetta.  The rendered fat from the lardons was used to fry the rice cake and eggs and added an extra layer of flavor.  As for the actual pancetta, I could distinctly taste the garlic, thyme, bay leaf, and pepper that went into the cure.  This wasn’t simply a piece of salt disguised as meat like I was accustomed to.

IMG_6658

Overall, I would say the pancetta itself and the bot chien with crispy fried pancetta were both great successes.  The pancetta turned out much better than I expected.  It’s climbed up to the number 2 spot on my breakfast meat list and bumped up bacon’s spot in the process as well.  Thanks to CharcutePalooza, I see nothing but a bright future with pancetta in my life.

Steamed Rice Flour Cake

Mise En Place (makes enough for at about 4 bot chien)

  • 113 g rice flour
  • 25 g tapioca starch
  • 1 Tbsp. oil
  • 414 g (1.75 C) water
  • 2 g salt
  • 2 g sugar

Method

  1. Mix all ingredients and place into a heatproof vessel such that the depth of the slurry is about half an inch.
  2. Steam over medium heat until a toothpick comes out clean, about 45 minutes.
  3. Let the cake cool and firm up.

Banh Bot Chien

Mise En Place

  • 100 g steamed rice flour cake cut into 1 inch by 2 inch rectangles
  • 55 g pancetta lardons
  • 3 large eggs, beaten
  • Handful of diced scallion
  • Your favorite pickled condiment
  • Soy sauce
  • Vinegar
  • Your favorite hot sauce (optional)

Method

  1. Crisp lardons in a pan over medium-low heat.  Set aside, leaving the rendered fat in the pan.
  2. Fry both sides of the rice cake over medium-high heat until golden brown.
  3. Add eggs to the pan, agitating slightly to distribute the egg.
  4. Flip the bot chien once the bottom has coagulated enough.
  5. Plate the bot chien and garnish with the pancetta lardons, scallion, and your favorite pickled condiment.
  6. For the dipping sauce, mix soy sauce, vinegar, and hot sauce (optional) to taste.

Monday, January 24, 2011

Groats

IMG_5325

During my days as an enterprise content management consultant, I would sometimes come across documents with interesting subject matter.  Two such topics that I’ll forever remember were Waffle Damage and Groats Versus Oats, mostly due to the absurdness I found in those titles and because at the time I didn’t know that groats were an actual thing.  In fact, there’s such a thing as groaty dick.  This hilarious revelation only helped fuel my need to cook up some groats.

IMG_5332IMG_5334

Since groats are essentially uncut steel-cut oats, I treated them as such during the cooking process but simply let them simmer a little longer than normal.  The final product tasted pretty much like steel-cut oats but with more texture, so to mix things up a bit I added some dried blackcurrants and pandan (which is becoming an ingredient that I’m increasingly trying to incorporate into things.)

IMG_5335

Overall, the groats were a somewhat sterile departure from a typical bowl of steel-cut oats given the fact that one is simply a chopped up version of the other.  Also, to be quite honest, I was really looking forward to the groats blowing me away considering there was a presentation dedicated to comparing them.  But perhaps that was the conclusion of the presentation: there really isn’t that much difference between groats and steel-cut oats when preparing them in a porridge.

Groats

  1. 2 C milk + 2 C water => simmer
  2. 1 T butter + saucepan/skillet => melt, medium heat
  3. 1 C groats + step #2 => toast, stir, ~2 minutes
  4. Step #3 + step #1 => simmer, don’t stir, ~10 minutes
  5. 1/4 t salt + step #4 => stir with wooden spoon handle occasionally, ~10 minutes

Sunday, January 16, 2011

Duck Prosciutto & Chinese Sticky Rice

IMG_6413

I’ve had a copy of Charcuterie for about 2 years now but for one reason or another never got around to making anything from it despite being a fan of cured meats.  Last week, I stumbled upon CharcutePalooza, and it was the nudge I needed to finally crack open the book.  January’s task: duck prosciutto.

IMG_6317

I was able to buy a whole duck with head and feet still attached  for $2.49/lb from my local Chinese grocery store.  Unfortunately, they only carried frozen ducks from Culver Duck Farms in Indiana.  I’ve seen fresh ducks sold at the grocery stores on Argyle, but settling with the frozen duck was logistically easier.

IMG_6331

After being packed in salt for 24 hours, the duck lost moisture and firmed up.  I ended up hanging the duck in my second bathroom with a humidifier running to battle the dry Chicago winter air.  Nine days later, the meat had lost about 30% of their weight and I had prosciutto.  Pretty easy.

IMG_6358IMG_6346

Because I bought a whole duck and the prosciutto only called for utilizing the breast meat, I tried to come up with something that would incorporate the rest of the duck in addition to the prosciutto.  What came to mind was Chinese sticky rice.  I substituted the prosciutto for Chinese sausage as a flavoring agent, soaked the sticky rice in duck stock made from the duck carcass, sous vide the legs and thighs in rendered duck fat and my soy mother sauce, and incorporated a salted duck egg on the side.

IMG_6356IMG_6370IMG_6372

Traditionally, dried shrimp are used for Chinese sticky rice, but I decided to use dried squid.  I’ve enjoyed eating dried squid as a snack since I was young, so I thought it would make a worthy substitute and add the brininess that the dried shrimp brings to the plate.  I also decided to use some dried mangoes for sweetness and tartness to cut the saltiness of the prosciutto and to replace the sweetness lost by opting out of the Chinese sausage.

IMG_6425

There may be people who scoff at applying heat to prosciutto, but I was going to try it anyways.  Not to worry, though, as I decided to keep half the breast unadulterated in order to appreciate it for what it is (it came out really well, by the way).  I chopped up some prosciutto into small cubes and crisped them up in a pan.  With that rendered fat, I sauteed shallots, ginger, shiitake mushrooms, dried squid, and dried mangoes to which some soy mother sauce and oyster sauce was added.

As I mentioned before, the rice was soaked in duck stock, but I added some pandan to add more leafy/floral aroma to the rice and for color.  In the end, though, the pandan flavor didn’t come through as much as I had hoped.  Before I bundled up the sticky rice in the lotus leaves, I placed some thinly sliced prosciutto in the hopes it would add even more flavor to the rice.

IMG_6434

The prosciutto did a serviceable job as a seasoning and flavoring agent in the sticky rice, but I honestly can’t say I prefer it over Chinese sausage in this situation.  Served with the sous vide duck legs and thighs and salted duck egg, the dish as a whole was quite good.  Ultimately, though, I think I learned that I prefer prosciutto served simply in it's natural state with melon or in some sort of salad or sandwich.  Good thing I saved half of the prosciutto to savor in its natural state.

IMG_6442

Chinese Sticky Rice With Duck Prosciutto

  1. 2 C sticky rice + duck stock or water => soak overnight, drain
  2. 28 g sliced & dried shiitake mushrooms => soak, 30 minutes
  3. 100 g shallots + 50 g ginger + 100 g dried mangoes + 30 g dried squid => dice
  4. 150 g duck prosciutto => dice, hot pan, crisp, set aside
  5. Rendered fat from step #4 + step #2 + step #3 => hot pan, saute, soy + oyster sauce to taste
  6. Step #1 + Step #4 + Step #5 => mix, wrap in lotus leaves, steam ~1 hour or until done