Sunday, May 15, 2011

Heart, Spleen, & Kidney Merguez

Truth be told, I don’t have much experience with North African cuisine only having eaten such food on two occasions: once at the 1-star Michelin Aziza and once at a small place in Monterey, California.  Both places were Moroccan and came recommended by my cousin’s Moroccan husband.  The impression that was left on me was a positive one as I’m a huge fan of cuisines that heavily rely on spices.

IMG_7205

Since this would be my first time making an encased meat and Moroccan food, I decided to play it safe and replicate the merguez offering currently featured on the menu at Franks ‘N' Dawgs and devised by Bob Zrenner of Hubbard Inn.  The item is a merguez sausage nestled between a lobster roll topped with pear chutney, Stilton cheese, black pepper Greek yogurt, sumac, toasted pistachios, and mint.  I wanted to avoid alterations, but chose to add roasted red bell peppers to the chutney because I had some left over from making the merguez.  I also used an Assyrian roll that I’ve recently fallen in love with instead of a lobster roll.

Initially, I was honestly not as excited as I usually am for Charcuteaplooza challenges because I’d simply be recreating something ingredient for ingredient rather than cooking something that required some sort of creativity or originality on my part.  This lack of enthusiasm quickly came to an end when I visited Marketplace On Oakton.

IMG_7161

Luckily for me, they were selling and butchering a lot of whole lambs in preparation for Easter.  As a result, they had a bountiful stock of fresh lamb casings (still with traces of poop and hay in them), lamb fat, and lamb offal.  Upon laying my eyes on these offerings, I got really excited.  Lamb heart and lamb fat would become the backbone of my merguez with lamb spleen and lamb kidney sprinkled in for character.  I arbitrarily decided on a balance of two-thirds heart, one-sixth spleen, and one-sixth kidney.

IMG_7168IMG_7170

When it came to grinding the meat, I knew the tricks of the trade as I’ve ground meat many times before.  The spleen and kidneys were a little tricky, though.  I had to freeze the two well beyond the typical “stiff yet pliable” state because they were so delicate and I didn’t want them to completely liquefy in the grinder.

IMG_7178

The fresh lamb casings were a lot narrower than I expected.  Before this challenge, I’d never worked with any type of casing but for some reason I expected them to be wider.  Cleaning the casings proved to be interesting and time consuming.  Being paranoid that the traces of poop lining the casings might make me sick, I flushed the casings 4 times and put them in a salt water brine for a day.

IMG_7183

Although grinding the meat was easy, stuffing the casings was a little more challenging.  After realizing there was no way I could stuff the casings by hand, I turned to the Kitchen Aid casing stuffer attachment.  Generally speaking, it did a decent job, but I ended up having to start over a couple times due to my inexperience.  For example, on my first attempt, the casings filled up with air like a balloon because the meat wasn’t primed and staged at the tip of the extruder.  Interestingly, the meat went from a deep red to brown while being held in the fridge overnight.

IMG_7202

With extra lamb fat on hand, I rendered it down and sauteed the sausage.  The fresh lamb casings turned out to be very delicate and unfortunately did not provide much snap.  Thankfully the pistachios provided texture to each bite.  In terms of flavor balance, things came together well.  There was sweet and spicy from the chutney, salty and spicy from the merguez, salty from the cheese, sweet from pistachios, sour from the yogurt and sumac, and herby from the mint.

Overall, the Franks ‘N’ Dawgs recreation turned out well.  More importantly, I learned how to stuff sausages in the process and made something Moroccan for the first time.  However, next time I make a sausage, I think I’ll use salt-packed pork casings to see if they provide more of that all-important snap to each bite.


Pear and Roasted Red Pepper Chutney

Mise En Place

  1. 400 g pears, diced
  2. 200 g roasted red bell peppers, diced
  3. 15 g ginger, minced
  4. 100 g (~2/5 cup) sugar
  5. 8 g (~2 Tbsp) paprika
  6. 8 g (~2 Tbsp) sumac
  7. 120 g (~1/2 cup) cider vinegar
  8. 2 Tbsp butter
  9. Salt
  10. Sriracha

Method

  1. Melt butter over medium-high heat
  2. Cook pears, about 2 minutes
  3. Add the rest of the ingredients and simmer gently until thickened, about 30 minutes
  4. Add salt and Sriracha to taste

Bob Zrenner’s “Le Merguez” Featured At Franks ‘N’ Dawgs

Mise En Place

  1. Merguez
  2. Your favorite roll or bun
  3. Your favorite chutney
  4. Your favorite bleu cheese
  5. Greek yogurt
  6. Black pepper
  7. Sumac
  8. Toasted Pistachios
  9. Fresh mint

Method

  1. Place the everything in the bun using a ratio of ingredients to your liking

Friday, April 15, 2011

Shrimp Etouffee With Tasso Ham (Two Ways)

IMG_7066

When I learned that April’s CharcutePalooza challenge would be tasso ham, I was both frightened and excited because I had no idea what tasso ham was.  However, once I read that tasso ham is a typical Cajun ingredient, I felt a little more comfortable as I’m somewhat familiar with the cuisine.  At that point, I decided to make an untraditional version one of my favorite Cajun dishes: etouffee.

IMG_7094

Since etouffee is traditionally served over rice, serving it inside a baked bao would qualify as untraditional.  The idea of stuffing a bao with etouffee came to me in a somewhat convoluted fashion.  When I started thinking about the ingredients for etouffee, the taste of celery from the holy trinity kept persisting in my mind.  I think this happened because I’m not a fan of raw celery, and that prejudice may have unconsciously carried over to cooked celery.

Regardless, the combination of celery and pork took me back to grandma’s baked char siu bao.  Her version of the classic Cantonese barbeque pork bun uniquely contained sauteed celery, and that became the catalyst for my etouffee baos.

IMG_7008IMG_7018

Out of all the CharcutePalooza challenges thus far, tasso ham required the least amount of time to prepare and could be done in a single day.  After curing for a few hours, the pork had to be smoked.  Since I didn’t have any existing smoking equipment, I opted to buy a small stovetop smoker.  In hindsight, I probably would have been happier spending a little extra more money on the larger model.

IMG_7024IMG_7037

The smoker came with some alder wood, which I read is commonly used to smoke seafood.  As such, I decided to use that as the source of smoke and make my etouffee a shrimp etouffee.  After reading through the manual, I was surprised to learn that the smoker is designed to create a 375 degree smoking environment.  Since the hot smoking recipes in Charcuterie call for a 200 degree smoking environment, I started the process on a medium heat stove for about 10 minutes in order to get the wood smoking and then transferred the smoker to a 200 degree oven.  It took about an hour for my 1-inch thick slabs to get up to temperature.

IMG_7099IMG_7109

With the tasso ham done, I turned to making pork-shrimp stock for the etouffee.  Using the pressure cooker method, I was able to make a nice pork stock from fresh meaty pork bones in about an hour.  Once the pork stock was strained, I added it back to the pressure cooker with the heads and shells from the shrimp I peeled for the etouffee and boiled it at pressure for about 10 minutes.  I made sure to squeeze every ounce of shrimp head goodness when straining the stock for a second time.

IMG_7013IMG_7055

As the pork-shrimp stock cooled overnight in the fridge, something odd happened.  What looked like tiny mountain ranges of amazing pork and shrimp fat congealed at the top.  Usually the fat congeals flat, but not this time.

IMG_7059

With all my mise en place finished, I started making the etouffee.  Despite having set out to eat the etouffee in bao form only, I simply couldn’t control myself.  Once it was done, I had to have a plate over rice right then and there.  Luckily for me, my Asian heritage pretty much guarantees that I’ll have leftover rice in the fridge 6 out of 7 days of the week.  The spices from the tasso ham melded nicely with the sauce and the smokiness from the alder wood definitely went well with the shrimp.

IMG_7076IMG_7087

With my plate of etouffee over rice devoured, I turned to thickening the sauce a little more so I could fill the baos without making a huge mess.  I could have easily just used more flour in the roux when making the etouffee sauce, but I wanted to experiment with xanthan gum for the first time after being inspired by the use of it in pasta in this post.  One gram of xanthan gum thickened the sauce enough to the point where I could easily portion the etouffee onto the bao dough, but it did make it a little clumpy.

IMG_7090

In the end, the etouffee baos were good, but I preferred the etouffee traditionally over rice because it had a higher sauce to starch ratio.  Although this is something easily remediable for next time, this meant there was simply more flavor in each bite when eaten eaten over rice.

As for the tasso ham, the smokiness heightened the etouffee a lot.  Being a fan of American barbeque, especially Chicago style rib tips, I can definitely say that I’ll be using my new smoker a lot this summer.  The only issue is that it makes my home smell smoky and savory for a good 4 or 5 days, which isn’t a necessarily a bad thing.


Shrimp Etouffee (adapted from here)

Mise En Place

  1. 75 g (~0.17 lbs) onion, diced
  2. 75 g (~0.17 lbs) bell peppers, diced
  3. 75 g (~0.17 lbs) celery, diced
  4. 175 g (~0.39 lbs) tasso ham, diced
  5. 490 g (~1 lb) shrimp, peeled
  6. 355 g (~1 cup) stock
  7. 113 g (1 stick) unsalted butter
  8. 16 g (~2 Tbsp) flour

Method

  1. Melt butter in a large pot over medium-high heat
  2. Add the flour once some of the liquid has evaporated from the butter.  Stir to make a  thin roux.
  3. Add the onion, bell peppers, and celery and stir until softened, about 5 minutes.
  4. Add the tasso ham and shrimp.  Simmer until thickened, about 5 minutes.
  5. Serve over rice.

Tuesday, March 15, 2011

Pho-Spiced Corned Beef Banh Mi With Purple Yam Fries

I really enjoy foods that are briny and pickle-y, so I was ecstatic when I read that this month’s CharcutePalooza challenge would be corned beef.  Simply making corned beef hash or straight up corned beef with braised vegetables would’ve been perfectly enjoyable for me, and although a Reuben is one of my favorite sandwiches of all time, those options all felt a little uninspired.

IMG_6883

During a recent conversation with my mom, we got on the topic of pho as I told her about the mighty fine bowl I had at Pho Kimmy.  With the aromatic scent of star anise, cinnamon,  fresh herbs, and beef broth permeating her childhood memories, she recounted the times she spent at the pho place her grandpa owned and operated in Vietnam.  However, her fondest memory of the eatery was not of a succulent bowl of pho but of a comforting impromptu sandwich her grandpa would make for her whenever she visited.

IMG_6867

The sandwich consisted of only four ingredients: tender brisket straight from a cauldron of simmering pho broth, Maggi, pepper, and a baguette.  Simplicity was the key to keeping his grandkids happy and satiated.  This story gave me the idea to make some sort of sandwich using pho-spiced corned beef as opposed to traditionally-spiced corned beef.  Rather than brisket, though, I decided to use beef tongue because I appreciate the amount of fat and flavor it has.

IMG_6681

Despite the fact that I’ve worked with tongue many times in the past, I opted to try my hand at skinning it raw rather than cooked after seeing a video of someone doing it masterfully.  This probably wasn’t the best idea.  It took quite a while to do because I failed to skin the top part off in one fell swoop.  My enthusiasm for trying out a new butchering technique threw a wrench in what was otherwise a no-brainer recipe.

IMG_6670IMG_6794

If there’s one thing I’ve learned so far from doing these CharcutePalooza challenges, it’s that basic charcuterie is really easy.  The amount of active time spent in the kitchen is very minimal, and the tasks required are not complicated.  Corned beef is no different: make the brine, stick the meat in the brine, wait a few days, cook.

IMG_6717IMG_6713

When it came to making the brine, I used charred onion and charred ginger for the aromatics and yellow rock candy instead of sugar.  These ingredients are essential to any pho broth and help give it its distinct flavor.  After the brine worked its magic for a few days, I turned to Thomas Keller’s Under Pressure and put my sous vide setup to work.

IMG_6800

After 24 hours in the water bath, the meat was super tender and moist.  The flavor was distinctly that of a cured meat, but the aroma and undertones were  undoubtedly that of pho.  In its chilled state, the amount of visible fat marbling found in the beef tongue was enough to make my mouth drool and my arteries cry.  Now that I had easy part done, I had to think of what I wanted on my sandwich.

IMG_6832

When conceptualizing the sandwich, I tried to work in as many pho components as I could.  Thai basil, cilantro, green onion, and Sriracha were all shoo-ins, but without any hot pho broth, I needed something to cut the fattiness of the tongue.  Luckily, I still had plenty of pickled radish and carrot from when I made pancetta.  The acidity and crunchiness of the pickled vegetables also served as a substitute for the squeeze of fresh lime and bean sprouts that are commonly added at the table to a bowl of pho.

IMG_6804IMG_6811

As for the hoisin sauce, I decided to force myself to find a way to incorporate its flavors into a side dish.  Setting constraints like this can lead to some great ideas that may have otherwise gone untapped.  However, I first had to figure out exactly what hoisin sauce was made of.  To my surprise, the main ingredient in hoisin sauce is sweet potato.  At first, I considered a sweet potato puree, but thought sweet potato fries would be a more appropriate accompaniment for a sandwich.  Furthermore, I opted for purple yams because I was curious to work with them; I’d only worked with the powdered form of purple yam in the past.

IMG_6874

The sandwich as a whole came out well.  With each passing bite, I couldn’t help but think of it as a pho banh mi, hence I’m labeling it as one.  Although the purple yam fries didn’t taste exactly like hoisin sauce, the flavor was familiar enough and did a decent job of adding sweetness to the plate just like hoisin sauce does.

When it comes down to it, my pho banh mi simply can’t compete with my great-grandpa’s ad hoc sandwich due to the sentimentality surrounding his, but if it can evoke just a single cherished memory in my mom’s mind (or anyone for that matter) then I’d consider it a success.  The ultimate success would be if new memories are formed and those thoughts percolate into yet another inspired creation.


Spice Ratio For Brine

Mise En Place (By Weight)

  1. Two units cinnamon
  2. Two units star anise
  3. Two units fennel seed
  4. Two units coriander seed
  5. One unit clove
  6. One unit Sichuan peppercorn
  7. One unit black peppercorn

Method

  1. 40 g (1.41 oz) of spice for a 1.27 kg (2.8 lbs) beef tongue in 2.4 L (2.54 qts) of 5% brine

Aromatics Ratio For Brine

Mise En Place (By Weight)

  1. Three units onion
  2. One unit ginger

Method

  1. Char onion and ginger over open flame or under broiler
  2. 500 g (1.1 lbs) of onion and 167 g (0.37 lbs) ginger for a 1.27 kg (2.8 lbs) beef tongue in 2.4 L (2.54 qts) of 5% brine

Pho Banh Mi

Mise En Place

  1. Pho-spiced corned beef, chilled and thinly sliced
  2. Thai basil, stems removed
  3. Cilantro, stems preferably removed
  4. Green onions, diced
  5. Your favorite pickled vegetable
  6. Mayonnaise, preferably homemade
  7. Sriracha (optional)
  8. Hoisin sauce (optional)
  9. Baguette

Method

  1. Heat baguette in oven
  2. Construct sandwich to taste.  Sometimes structural integrity can be improved by placing garnishes on the bottom beneath the meat.

Sunday, March 6, 2011

Dulce De Leche Brownies

Dulce de leche is a rather recent discovery for me.  A couple years ago, I helped organize a few international movie nights at work and had the idea to bring in some food from each movie’s country of origin.  For example, I made samosas for the Bollywood movie night.

IMG_6770

When it came time to watch the Argentinian film Nine Queens, one of my favorite movies, I turned to the advice of my friend from Buenos Aires because I had no clue what the cuisine of Argentina was like.  She suggested I make alfajores de dulce de leche: a sandwich cookie with dulce de leche in the middle.  I was hooked on dulce de leche from that point on and frequently found myself eating it straight up by the spoonful.  Simply describing it as “caramel” doesn’t really do it justice.

IMG_6789IMG_6786

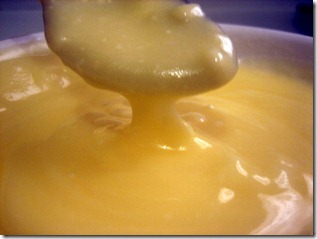
The first time I made dulce de leche, I used the stovetop method of simmering a can of sweetened condensed milk for a few hours.  This method works fine, but now that I have a sous vide setup, I thought I’d try it that way and hold it in a 185 F water bath for about 14 hours.  As a side note, I would not recommend the microwave method of making dulce de leche unless time is an issue.  It’s too much trouble compared to the simmer-in-a-can method.

Recently, I’ve been making chocolates and chocolate pastries featuring dulce de leche.  The rich and creamy caramel-like flavor of dulce de leche (as I said before, not doing it justice) goes nicely with the bitterness of chocolate.  The brownie recipe I’ve been tinkering with is from Thomas Keller’s Ad Hoc at Home and I found the recipe’s method of preparing the butter interesting.  Not only does it call for a artery-clogging 3 sticks of butter, but it calls for melting half the butter and using that to melt the other half.  This results in a very creamy emulsion that I’ve never seen before with butter.

IMG_6731IMG_6734

As for the dulce de leche, I portioned out 100 grams of the confection and popped it in the freezer to harden so I could chop it up into small, even chunks and add it to the batter.  This probably wasn’t the best idea as the distribution of the dulce de leche didn’t turn out very well and I ended up just scooping dulce de leche onto the finished brownies.

IMG_6739IMG_6742

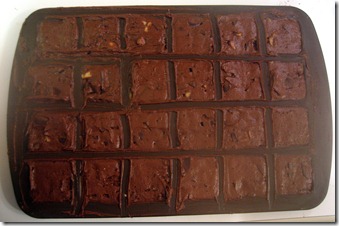
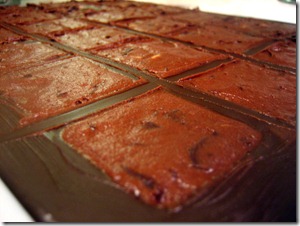
Instead of using a traditional baking vessel, I decided to use a silicone mold that I originally bought for making chocolates.  Incidentally, the mold is actually marketed as a brownie mold.  The mold worked well enough and helped each square develop a nice texture on the top edge much like the rim on a muffin top.  Brownies with a muffin top rim?  I’ll take it.

IMG_6779

Another success was serving the brownies with a side of crispy homemade pancetta.  Alternating between sweet and salty extended the addictiveness of an already crack-like dessert, and I’m a big fan of a little saltiness with my sweets to balance things out.

Dulce De Leche

Mise En Place

  • One 14-ounce can sweetened condensed milk, label removed

Method

    1. Submerse the can completely in a pot and simmer (do not boil) for 3-4 hours.  A longer simmering time results in a thicker dulce de leche.  Alternatively, submerse the can in a 185 F water bath for about 14 hours.
    2. Cool for about 15 minutes.  At this point, the dulce de leche will be like a thick sauce and be used as such if desired.
    3. Refrigerate.  It will harden as it cools.

Brownies

Via Ad Hoc at Home

Tuesday, March 1, 2011

Rice-Butter-Maggi-Egg

IMG_6509

Everyone has fond memories of their favorite comfort foods growing up.  For me, one of those comfort foods is what my family refers to as “rice-butter-Maggi-egg.”  The dish is exactly what it sounds like: rice topped with butter, Maggi, and eggs with a dash of black pepper.  Rice-butter-Maggi-egg was my mom’s go-to dish whenever she needed to whip something up fast.  It has since become one of my emergency meals when I’m feeling too lazy to do any actual cooking or when I have no produce or pantry items to work with.

IMG_6494IMG_6691

For anyone not familiar with Maggi, I’d describe it as zingy soy sauce with more depth.  It’s easily found at any Asian grocery store, but the trick is to find a place that sells Maggi that’s made in Europe (Germany if I recall correctly).  The bottles with the yellow tops are made in China and are perfectly fine, but the bottles with the red tops that are made in Europe taste so much better.  The European version has more depth and punchiness than the Chinese version.

IMG_6689IMG_6692

When it comes to the butter in rice-butter-Maggi-egg, I tend to use Bretel.  It may seem odd to get butter out of a can, but it’s seriously really good and melts in your mouth.  I first discovered Bretel maybe 10 years ago at my aunt’s house where a petit dejeuner of bread and butter is common for breakfast.  The baguettes come from a Vietnamese-Belgian bakery and the butter from France in the form of Bretel.  Canned butter is so popular in Vietnam that counterfeit brands exist.  My mom and uncle have told me stories of how people in Vietnam unwittingly buy Bertel instead of Bretel.

IMG_6484

The egg component of rice-butter-Maggi-egg typically consists of a sunny side up egg.  However, in my ongoing experimentation with sous vide eggs, I decided to sous vide the eggs at 63 C (145.4 F) for an hour.  The yolks turned out creamy and runny like I wanted, but the whites turned out a little too runny for my taste.  Texturally, a custardy and slightly runny egg white doesn’t sit well with me.  To remedy this, I put the eggs in boiling water for about 30 seconds to firm up the egg whites.

IMG_6514

Once all the components are on a plate, one of my favorite things to do is to break the yolk and mix it with a little of buttered rice and Maggi.  This humble dish will always be a winner in my book and I can’t see myself ever getting tired of it.